> ## Documentation Index
> Fetch the complete documentation index at: https://docs.trymaitai.com/llms.txt
> Use this file to discover all available pages before exploring further.
# Import Data
> Upload your data to the Portal to build custom models specific to your application
Importing your data is the first step toward finetuning models and building agents. The Portal makes it easy and quick to upload, examine, and augment your data.
The Import Data feature can be accessed from two places:
* **Global view**: Forge > Compositions > Datasets
* **Application view**: select an existing Application, drill into the Intents tab, and select an Intent. From there, click on the Datasets tab
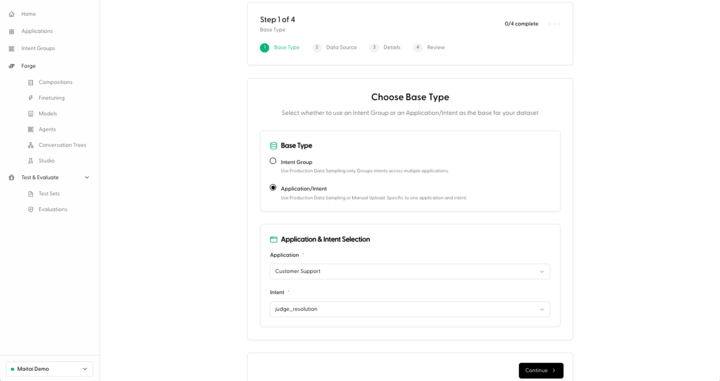
From either view, click on the **New Dataset** button. If you are coming from the Global view, you will have to choose an Application and Intent to assign the dataset to. You can also create a new Application and Intent using the dropdown if necessary.
 ## Manually Upload a Dataset
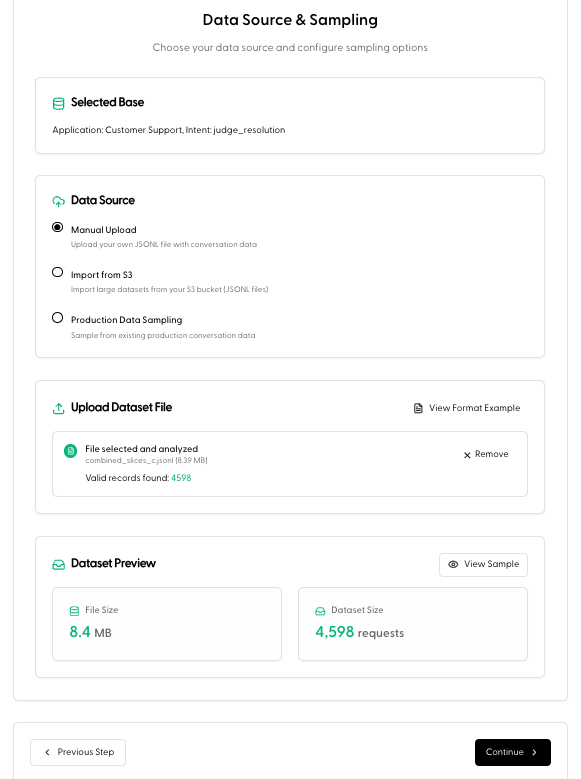
1. Select **Manual Upload** under the Data Source options.
2. Under Upload Dataset File, select a JSONL dataset file from your computer. Hit **Continue**.
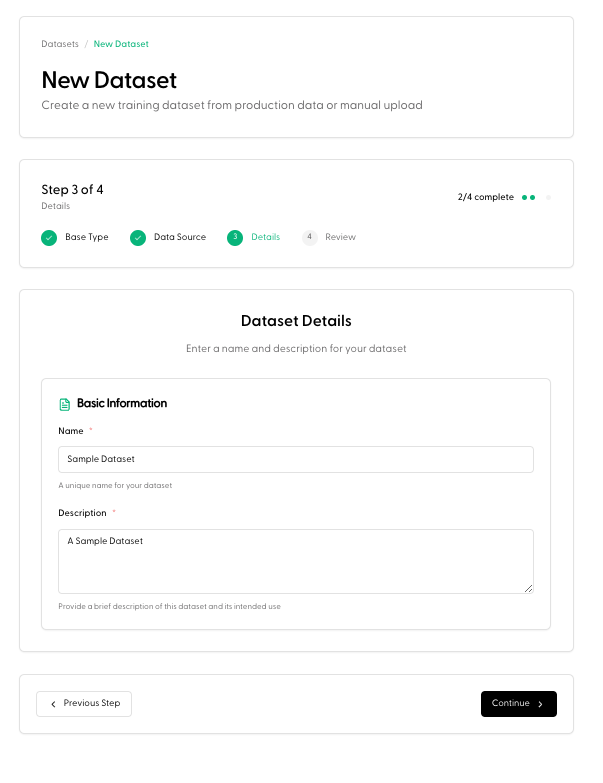
3. Under Basic Information, enter a Name and Description for the dataset. Hit **Continue**.
4. Review the Dataset Summary, and click **Create Dataset**.
## Import from S3
1. Select **Import from S3** under the Data Source options.
2. Enter the S3 URL (Add the AWS Region and File glob if necessary).
3. Copy and paste the Bucket Policy script into the Permissions section in your AWS account. Replace `YOUR_PREFIX` with the folder path WITHOUT a leading slash (example: `data/exports`). If you want to grant access to the bucket root, use an empty prefix and remove the prefix condition.
4. Click **Validate Access** in the Portal. Hit **Continue**.
5. Under Basic Information enter a Name and Description for the dataset. Hit **Continue**.
6. Review the Dataset Summary, and click **Create Dataset**.
## Manually Upload a Dataset
1. Select **Manual Upload** under the Data Source options.
2. Under Upload Dataset File, select a JSONL dataset file from your computer. Hit **Continue**.
3. Under Basic Information, enter a Name and Description for the dataset. Hit **Continue**.
4. Review the Dataset Summary, and click **Create Dataset**.
## Import from S3
1. Select **Import from S3** under the Data Source options.
2. Enter the S3 URL (Add the AWS Region and File glob if necessary).
3. Copy and paste the Bucket Policy script into the Permissions section in your AWS account. Replace `YOUR_PREFIX` with the folder path WITHOUT a leading slash (example: `data/exports`). If you want to grant access to the bucket root, use an empty prefix and remove the prefix condition.
4. Click **Validate Access** in the Portal. Hit **Continue**.
5. Under Basic Information enter a Name and Description for the dataset. Hit **Continue**.
6. Review the Dataset Summary, and click **Create Dataset**.