> ## Documentation Index
> Fetch the complete documentation index at: https://docs.trymaitai.com/llms.txt
> Use this file to discover all available pages before exploring further.
# Create Test Sets
> Turn real requests into a regression suite you can rerun as you iterate
Test Sets are how you curate a stable collection of `input + expected output` items so you can
repeatedly benchmark changes (configuration, prompts, models, workflows, agents) in a consistent
way. A test set is **type-less**: one set can hold items from production requests, workflow runs,
agent tasks, or manual entries.
If you want the full reference docs for Test Sets, start here:
* [Test Set Creation](/test/test_sets/creation)
* [Test Run Execution](/test/test_sets/execution)
* [Interpreting Results](/test/test_sets/results)
## Where to find Test Sets
In the Portal, go to `Test > Test Sets`, the list shows every test set in your company.
## Create a Test Set (wizard)
1. Click **New Test Set**.
2. Pick the **Application** the set belongs to, add a **name** (required) and optional description.
3. Add **items**: from any mix of sources (Request, Workflow Run, Agent Task, Manual), or upload a
JSONL file. You can also skip this and add items later.
* Use **View** to inspect an item before adding.
4. Review and optionally mark the set as **Golden**.
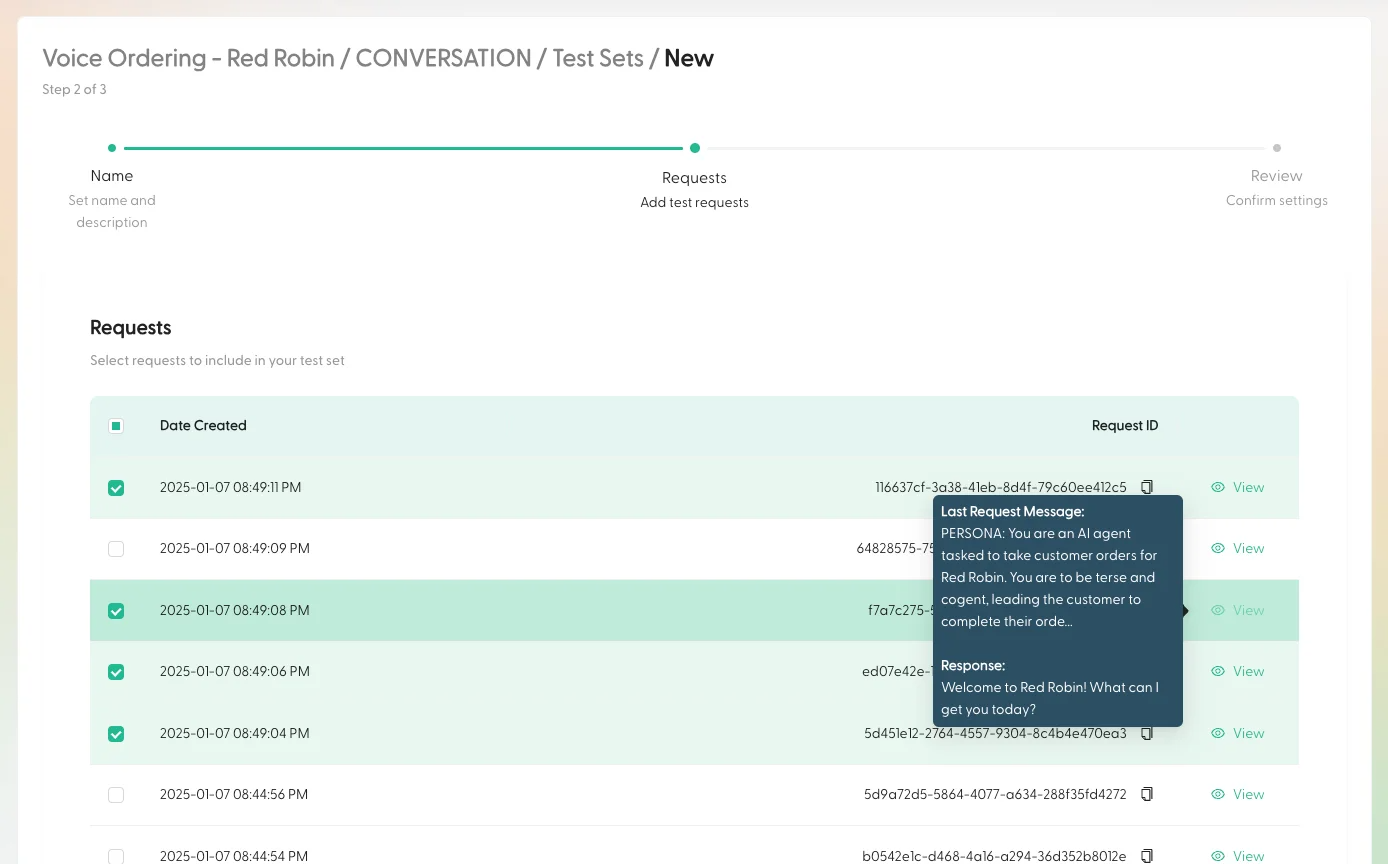 Don’t worry about perfect coverage on day one, you can add more items as you discover new edge cases.
## Add a request to a Test Set while you’re debugging
The fastest way to build a Test Set is to “promote” interesting requests you’ve already observed.
### From a Request page
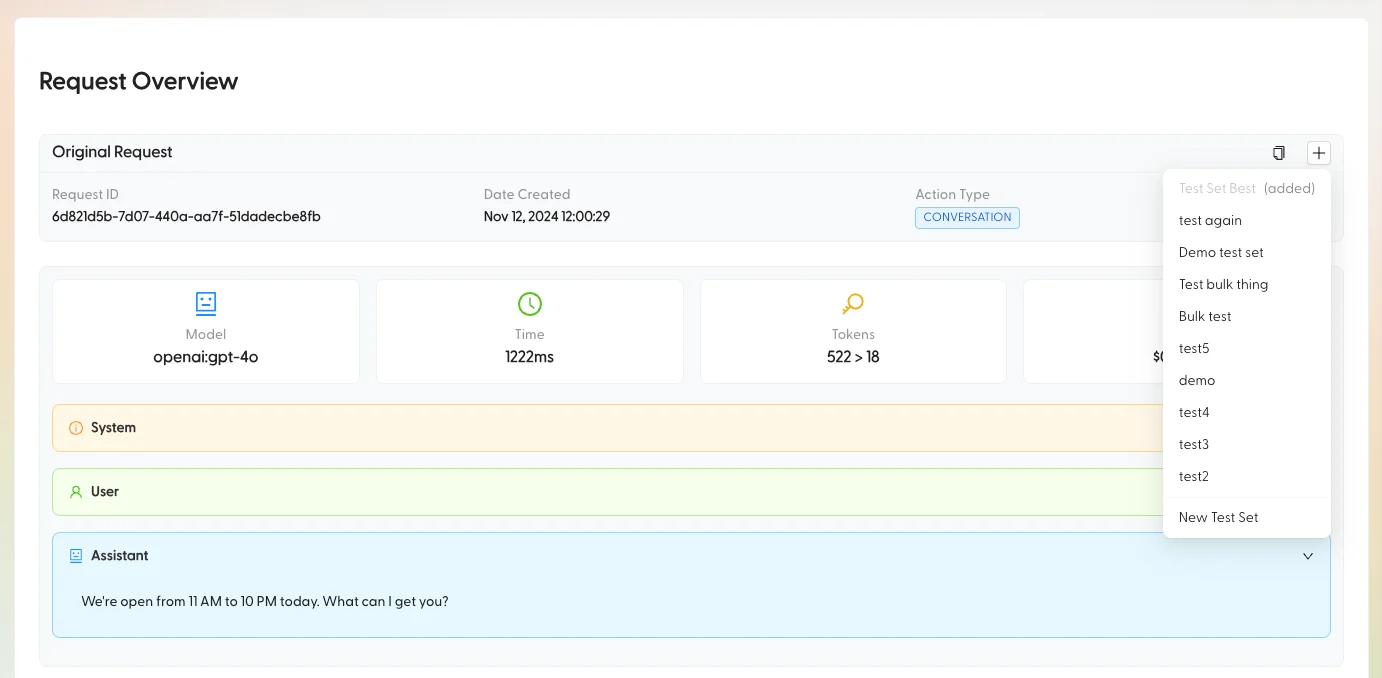
1. Open a request (for example from an Intent Group’s **Requests** tab or from `Test > Evaluations`).
2. Click **Add to Test Set**.
3. Pick an existing Test Set (or create a new one inline).
4. Add tags and submit.
Don’t worry about perfect coverage on day one, you can add more items as you discover new edge cases.
## Add a request to a Test Set while you’re debugging
The fastest way to build a Test Set is to “promote” interesting requests you’ve already observed.
### From a Request page
1. Open a request (for example from an Intent Group’s **Requests** tab or from `Test > Evaluations`).
2. Click **Add to Test Set**.
3. Pick an existing Test Set (or create a new one inline).
4. Add tags and submit.
 ### From a Session view
1. Find the request row you care about.
2. Click the `+` action to open the **Add to Test Set** menu.
3. Pick a Test Set, add tags, submit.
### From a Session view
1. Find the request row you care about.
2. Click the `+` action to open the **Add to Test Set** menu.
3. Pick a Test Set, add tags, submit.
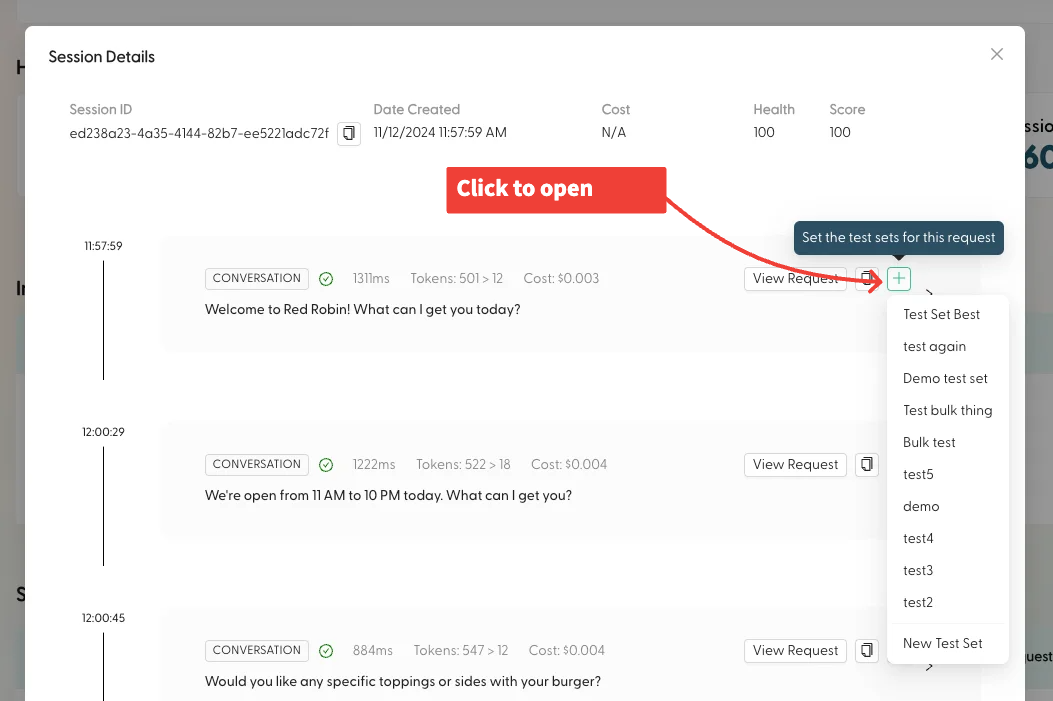 In the Add-to-Test-Set menu, the Portal enforces a maximum of **5** tags for that flow. If you need richer tagging, you can tag in the Test Set request tables after the request is added.
## Correct the “expected” response (when the original response is wrong)
If the model response in production is wrong (but you know what it *should* have said), update the Test Set’s expected response by editing the request’s **final assistant message**.
You can do this either:
* **Before adding** (from the Eligible Requests table during Test Set creation), or
* **After adding** (from the Test Set’s request tables, using the request edit action)
This is described in detail in [Test Set Creation](/test/test_sets/creation).
In the Add-to-Test-Set menu, the Portal enforces a maximum of **5** tags for that flow. If you need richer tagging, you can tag in the Test Set request tables after the request is added.
## Correct the “expected” response (when the original response is wrong)
If the model response in production is wrong (but you know what it *should* have said), update the Test Set’s expected response by editing the request’s **final assistant message**.
You can do this either:
* **Before adding** (from the Eligible Requests table during Test Set creation), or
* **After adding** (from the Test Set’s request tables, using the request edit action)
This is described in detail in [Test Set Creation](/test/test_sets/creation).